I'm a Makeup Artist and This Blush Hack Will Completely Change Your Face

Megan Megan

I’m just going to come out and say it... I'm a blush-a-holic. I really love blush.

For a humble makeup product, blush can be pretty divisive. Some people won't touch the stuff, while others (like me) can't get enough. But even though now I'm OBSESSED with adding a radiant flush to my cheeks - and love adding it to my clients' faces - this wasn’t always the case.

Growing up, I'd get super red cheeks at the drop of the hat. I could overheat in the slightest way and BOOM, cheeks would resemble shades of a crimson peach. Sound familiar?

Pair this with the fact blush got kicked to the curb for contouring and bronzers for a large chunk of the 2000s and you can probably understand how my blush aversion developed.

Thankfully, I came around to the idea of blush. First with a low-commitment peachy bronze powder. Then, a peachy pink. And now? You'll often find me rocking a rosy cream blush. Maybe even a bright pink here and there.

The concept of blush (or rouge) has been around since ancient times: A soft pigment that aims to mimic the natural flush of your cheeks/face. But I can understand if you've been avoiding blush for fear of looking like you've had an allergic reaction.

Stay with me, because I have a blush hack that can completely transform your face.

Where to Apply Blush.

When applying blush, we've always been taught to smile slightly and place product to the 'apples' of our cheeks.

This technique can work for some, but for many, applying blush while smiling can actually drag your face down because... who smiles like they have a secret all day?

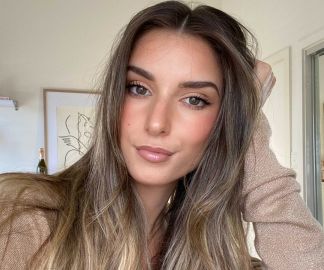
Instead, I have another technique that delivers a healthy-looking flush to the cheeks AND gives the illusion of sculpted, lifted cheekbones.

Next time you're applying your blush, try following these steps (or watch my TikTok video below!).

1. Keep your face completely straight, no smiling!

2. Line up your finger, sponge or makeup brush with the centre of your pupil and draw an imaginary line down to where your cheekbones start.

3. Using this line as your starting point, apply your blush diagonally upwards along your cheekbones.

By applying blush in this way, the concentration of pigment is dispersed along the high points of your cheekbone. This creates the illusion of a lifted face. On the other hand, adding blush to the apples of your cheeks when smiling means the concentration of colour rests on the lower half of the face once you stop smiling, dragging the face downwards.

Try each method out and see if you can spot the difference for yourself!

Best Blushes To Try ASAP.

OK, now we’ve talked technique, let me run you through some of my all-time fave blushes so you can go forth and enjoy!

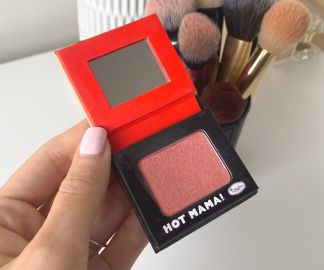
First up, we have an oldie but a goodie: theBalm Hot Mama, $27.95.

theBalm Hot Mama theBalm Hot Mama

theBalm Hot Mama is a shimmery pinky/peach compact that really is an all-rounder when it comes to blushes. It compliments bronzer effortlessly and is quite forgiving if you happen to apply it in the wrong areas.

Subtle luminescent pigments milled throughout give the skin an effortless glow that lasts all day (or all night long). It's great for all skin types, but especially oily skin types as powders are excellent at concealing shine throughout wear. 

And if my opinion isn't enough to convince you, here's what Adore Beauty customers say about theBalm Hot Mama:

"Very pigmented and pretty blush! I don't find the formula to be dry - but it's just pressed enough that you don't pick up too much powder easily. Definitely a warm peachy tone with gold shimmer (like NARS orgasm). Great dupe and bargain!" - Sylvia


"This is such a lovely affordable blush with great colour pay-off! I have tan skin and this gives a really nice glow without being too shimmery." - Mia

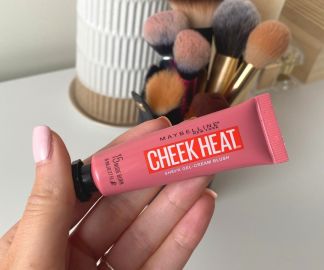
My second favourite is an absolute bargain: Maybelline Cheek Heat Gel Cream Blush, $16.95.

Maybelline Cheek Heat Gel Cream Blush Maybelline Cheek Heat Gel Cream Blush

If you’re looking to try out an alternative to powder blush but aren’t sure where to start, Maybelline Cheek Heat Gel Cream Blush is a pretty good one to test the waters with.

Cheek Heat is a hybrid buildable cream-gel blush formula that glides onto the skin beautifully. Don't be put off by the bright packaging, each shade leaves you with a sheer, glowing flush. It's also great for all skin types, and for anyone who loves a glowy, dewy finish.

You can apply this liquid blush with either your fingers or a synthetic kabuki brush. Pro tip: Always use dabbing motions when applying liquid blushes to avoid disturbing any makeup you have on underneath the blush.

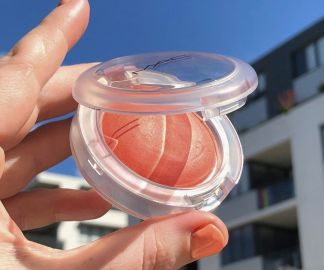
And my final product is actually a staff fave from Senior Editor Amy Clark: M·A·C Cosmetics Glow Play Blush, $48.

M·A·C Cosmetics Glow Play Blush M·A·C Cosmetics Glow Play Blush

Here's why she loves it:

"M.A.C COSMETICS Glow Play Blush is a juicy, bouncy cream blush with the staying power of a powder blush. This is the way of the future. I'd describe the texture as creamy and velvety, and when you dab the product into the skin, it leaves you looking instantly fresh and glowy thanks to the tiniest bit of natural-looking iridescence. I've been using the shade That's Peachy as a blush and across my eyelids as a cream eye shadow, but you've got six glorious shades to choose from."

And that is how to apply blush for naturally snatched cheekbones!

For more beginner makeup hacks, you can watch my YouTube blush, bronzer, contour and highlighter tutorial below.

    Subscribe for beauty sales, free goodies, advice and SO much more!