Beginners Blush, Highlight and Contour Tutorial

I am the Content Manager here at Adore Beauty. I have been a makeup artist for over 6 years now and love all things beauty.
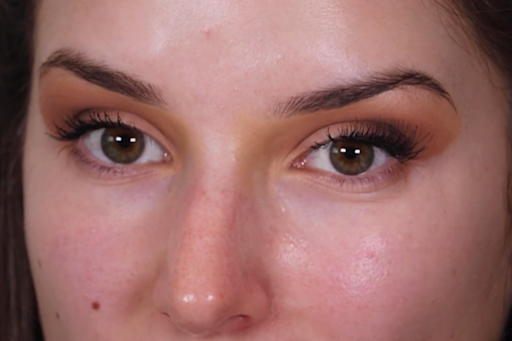
Bring life and luminosity to your complexion in this beginner’s routine for blush, highlight, and contour.
In this easy to follow guide, Megan Miloshis from our Social and Content Team, who is also an experienced MUA, takes us through her Contouring 101 masterclass.
These simple tricks and tips will have you feeling bronzed and glowy in no time!
How do I contour my face seamlessly?
As Megan explains, contouring has come a long way from its background in theatre makeup or even the high contrast contour and highlight trend popularized by Kimmy K in 2015.
While contouring is still about creating shape through shadow on the face, these days it’s more about perfecting that universal glow to the skin.
Megan’s Contouring 101:
In this routine Megan shows us the right tricks and techniques to subtly apply contour, blush and highlighter using powder products.
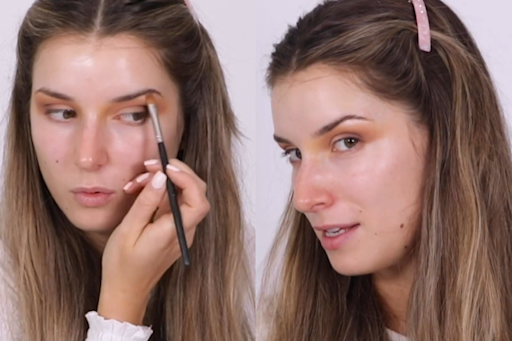
Step 1: Define your cheeks using an angled brush

Step 1: Define your cheeks using an angled brush
Start by taking an angled brush and dipping it in a matte bronzer like the and then defining your contour. You can find the contour of your cheeks by feeling just under your cheekbones for your hollow. Create a diagonal line going up from the centre of your hollow up towards your tragus. While concentrating the colour in this area, lightly buff and blend so it is somewhat diffused.

Step 2: Warm up the perimeter of your face

Step 2: Warm up the perimeter of your face
Next, warm up the perimeter of your face with the bronzer, blending it into the top of your forehead (avoiding your hairline), temples and jawline (taking it down your neck). Pat on the product instead of swiping.
Step 3: Contour the nose

Step 3: Contour the nose
To contour your nose take a small blending brush (for eye shadow) and dip it into your bronzer. Then, use the bronzer to define the edges of your nose, elongating your bridge. Blend well so it does not appear like a stripe. You can take the product upwards and connect it to your brow. You can also contour the front of your nose to make that passage look a bit more narrow.
Step 4: A rosy flush

Step 4: A rosy flush
For blush, Megan uses . Dip into the product with a tapered blush brush and then tap off the excess. Then, smile so you can see the apples of your cheeks and apply the blush directly to this area, gently swiping backwards towards your temples, following just above the line of your contour. Lightly blend and buff.

Step 5: Blend your blush and bronzer

Step 5: Blend your blush and bronzer
Taking a clean buffing brush blend your blush and bronzer so the line is seamless.
Step 6: Illuminate the skin

Step 6: Illuminate the skin
While you can use a small fluffy brush to apply highlighter to your cheekbones, Megan likes to use her fingers to melt the into the skin for a natural, lit from within glow. Use your ring finger to tap on the product to the high points of your cheeks. You can also apply highlighter to your cupid’s bow, brow bone, and tip of the nose.

We hope you enjoyed Megan’s routine for lightly defined and glowing cheeks. While Megan has chosen powder products that suit her skin tone and complexion we do stock a range of different shades, as well as cream products to suit your skin type!
Please don't hesitate to get in touch with our Customer Service team for the best advice regarding what product will suit you best.
MUA Tips:
- Try contouring with a more tailored, angled brush. If you only have a bigger, fluffy brush, Megan recommends you use your fingers to pinch or flatten it.
- When contouring, start lightly and build up the colour as needed.
- Try contouring first, this creates the initial framework and structure of your face you can then build off.
- Use small circular blending motions rather than a harsh stripe.
- Try to avoid blending too much product into your hairline, and start by applying the product at least one cm away.

Long Lasting Kryolan Foundation Tutorial
Find out how Megan creates a foundation base that lasts plus her best makeup tips and tricks
Easy Eyeshadow Tutorial For Beginners
Find out which products are best for a beginnners eyeshadow look. Megan shows us her easy step by step eyeshadow routine for a bronzy, matte eye.