3 Benefit Eyebrow Tutorials Using The Benefit Brow Styler

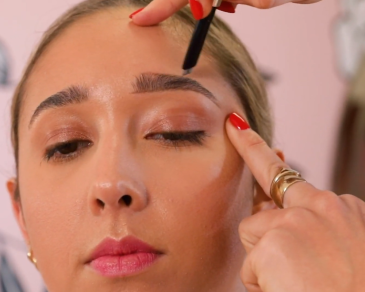
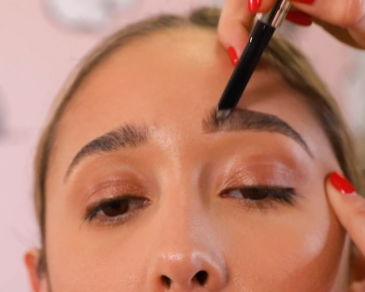
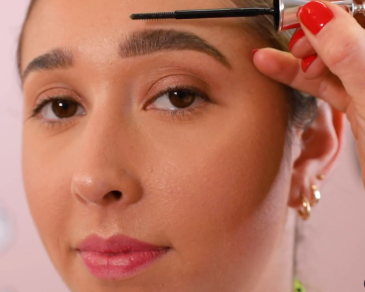
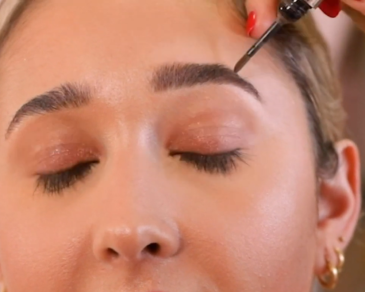
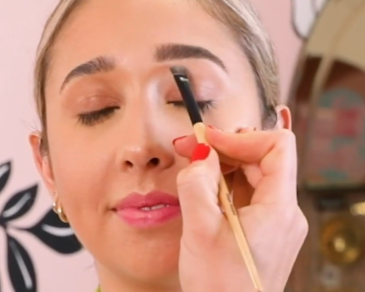
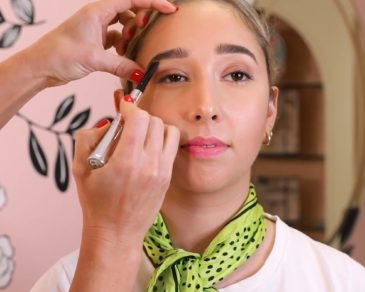
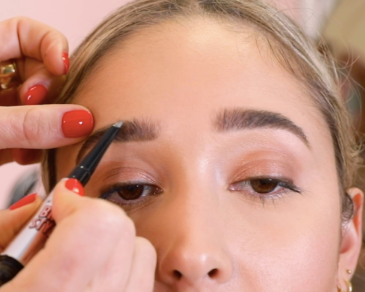
Redefine your brows with the Benefit Cosmetics Brow Styler, a versatile product that allows you to fill in sparse hairs with two different methods.

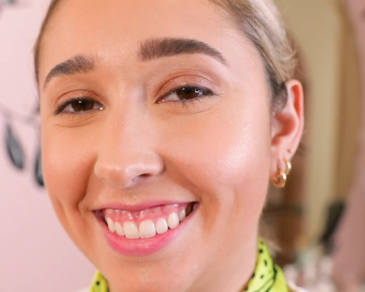
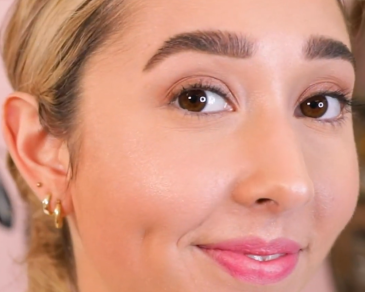
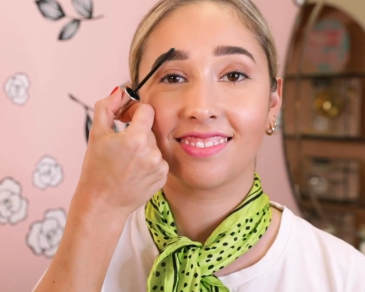
These quick and easy routines will have you brows looking clean and sharp, fluffy and full or deep and defined in no time. 

The Benefit Cosmetics Brow Styler has an angular tip, which is less of a teardrop more of a diamond for precision. The styler also has lots of glade and even more hold (18hrs!).

How do I choose the right eyebrow colour?

If you’re wondering how to find the right brow colour, then we’re here to help. Benefit has an amazing shade range with plenty of undertones, so let’s make it easier to pinpoint one that’s best for you.

Firstly, it’s important not to choose a shade that matches your exact hair colour. Brows need dimension and the best way to subvert a monochromatic look is to choose 1-2 shades darker if you have lighter brows or 1-2 shades lighter.

The other important step is to think about your undertones. Try to pick a brow product with the same undertone and your skin and hair. So, if your hair leans golden or red, then try a warm undertone. If your hair is more ashy we recommend trying a cool or neutral shade.

How to create perfect brows

In these routines we’ll show you how to fill in your brows with both the wax pencil and loose powder for 3 completely different finishes and effects. 

BROW 1:

BROW 1:

Clean and Shaped

Step 1: Create a line that lifts

Step 1: Create a line that lifts

Using your Benefit Cosmetics Brow Styler, line up the point of your pencil with your brow. Draw a straight, clean line across the bottom of your brow. This will give you a streamlined lift to your brow. Continue this line down to the tail end of your brow.

Step 2: Define the brow

Step 2: Define the brow

Create a similar line on the top of your brow so that the shape of your brow is clearly defined.

Step 3: Push and buff

Step 3: Push and buff

Using the pencil on a flat angle use upwards strokes to fill in the brow, pushing and buffing in the product. This technique will help lift brows upwards.

Step 4: Sharpen up

Step 4: Sharpen up

Using the fine point of your pen, sharpen up the brow. This will help to define those outer angles around the tail and arch of your brow.

Step 5: 24hr brow setter

Step 5: 24hr brow setter

Using the Benefit 24 Hour Brow Setter Clear Brow Gel set in your shape. This product is like hairspray for the brows. It’s also clear so won’t add any piment, just a glossing effect. Brush in the direction of your hair’s natural growth. This brush has two sides so you can use the shorter bristles to taper in any long hairs.

BROW 2:

BROW 2:

Soft and Full

Step 1: Fill it out with a powder

Step 1: Fill it out with a powder

Using the loose powder side of the Benefit Cosmetics Brow Styler, start in the middle of your brow, as this is where you will want to deposit the most pigment. Buff the product through to the tip of your brow. Now that there is less product on the applicator, you can start to buff this product through to the front of the brow. The precision doe-foot applicator on this product allows for mess free application of this pigmented powder.

Step 2: Flick it up

Step 2: Flick it up

Using the tip of the powder applicator flick the brow hairs upwards for a fluffy effect.

Step 3: Clean & tidy

Step 3: Clean & tidy

If the edges of your brows are looking a bit blurry feel free to clean them up with a foundation or concealer like the Benefit Boi-ing Cakeless Concealer, buffing it in around the edges of your brows.

BROW 3:

BROW 3:

Bold and Defined

Step 1: Shape and define

Step 1: Shape and define

Using the wax pencil side of Benefit Cosmetics Brow Styler follow steps 1-3 of the Clean and Sharp routine. However, make sure not to concentrate too much product on the centre of the brow as this is where the powder will go.

Step 2: Add loose powder

Step 2: Add loose powder

Take the powder side of the Benefit Cosmetics Brow Styler and swirl the brush tip in the product so it is evenly coated, tapping it from side to side to remove any excess product. Starting at the centre of the arch apply the product to the middle- tip of the brow and then buff it through with the flat side of the brush.

Step 3: Redefine your brows

Step 3: Redefine your brows

Once the powder has been distributed, go back in with the wax pencil side of the Benefit Cosmetics Brow Styler to crisp up the shape of the brow, redefining any dull edges.

Step 4: Super staying power

Step 4: Super staying power

Taking the Benefit 24 Hour Brow Setter Clear Brow Gel repeat step 5 of the Clean and Shaped routine to really set these bowl brows in and you’re done!

Benefit Brow Tips:

  • When defining your brows it’s easy to work in 4 lines. 1 from the start of your brow to the arch, 1 from the arch to the tail, both on the top and the bottom. (Note: diagram/graphic could be useful here) 

  • Make sure to concentrate the pigment of both the wax and the powder on the arch and tip of the brow, not the front. This way you can create a natural gradient effect that is really flattering on the face. 


This routine was transcribed by India Williams


A Makeup Artist's Advice On How To Get Glowy, Dewy Skin

Before you start your glowy makeup look, why not try this skincare routine for radiant skin?

Our Go-to Dewy Makeup Look Using Giorgio Armani Luminous Silk

Try a subtle and sophisticated glow up with this L’Oreal Australia makeup routine from Ross Andrewartha

A Simple Daily Makeup Routine Using Bobbi Brown Cosmetics

Kheahni Jackson from Bobbi Brown Cosmetics, Australia shows us how to Prep + Correct + Perfect your everyday base, brightening the undereye and leaving your skin looking fresh.

    DISCOVER MORE ROUTINES LIKE THIS

    Subscribe for beauty sales, free goodies, advice and SO much more!